
dukDukz
http 통신 (get, post 요청 응답) - 상세 설명 본문
코드
server.js
const express = require('express');
const nunjucks = require('nunjucks');
const bodyParser = require('body-parser');
const app = express();

app.use(bodyParser.urlencoded({extended:false}));

app.set('view engine','html');
nunjucks.configure('views',{
    express:app,
});

app.get('/',(req,res)=>{
    res.render('index');
});

app.get('/login',(req,res)=>{
    console.log(req.headers);
    let {userid, userpw} = req.query;
    console.log(userid,userpw);

    res.setTimeout(3000,()=>{
        res.send(`GET OK ${userid}/${userpw}`);
    })
    //res.send(`GET OK ${userid}/${userpw}`);
});


app.post('/login',(req,res)=>{
    let {userid, userpw} = req.body;
    console.log(userid,userpw);
    res.send(`post OK ${userid}/${userpw}`);
});


app.listen(3000,()=>{
    console.log('server 3000');
})

/*

http 통신 프로토콜
client <---> server

*/
index.html
<!-- GET 요청하기 -->
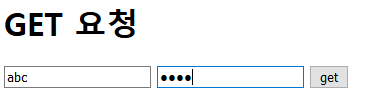
<h1>GET 요청</h1>
<form action="/login" method="get">
<input type="text" name="userid">
<input type="password" name="userpw">
<input type="submit" value="get"> <!--첫번째-->
</form>
<!-- POST 요청하기 -->
<h1>POST 요청</h1>
<form action="/login" method="post">
<input type="text" name="userid">
<input type="password" name="userpw">
<input type="submit" value="post">
</form>
<!-- 비동기 활용하기 -->
<h1>비동기 활용하기 GET</h1>
<button id="btn">통신하기</button>
<div id="getroot"></div>
<script>
const btn = document.querySelector('#btn');
btn.addEventListener('click',btnFn);
function btnFn(){
console.log('req click');
let options ={
method:'GET'
}
//Promise Object
fetch('http://localhost:3000/login?userid=abc&userpw=addd',options)
.then(data =>{
console.log("data = ",data);
return data.text(); // do something with the text response 어떠한 매서드임
}) // Promise Object
.then(text=>{ // 그 text로 변환한 값을 여기서 text로 사용한다.
const root = document.querySelector('#getroot');
root.innerHTML += text+'<br />';
console.log("text = ",text);
})
}
</script>
<h1>비동기 활용하기 POST</h1>
<button id="btn2">통신하기</button>
<div id="postroot"></div>
<script>
const btn2 = document.querySelector('#btn2');
btn2.addEventListener('click',btnFn2);
function btnFn2(){
console.log('req click');
let options = {
method:'POST',
headers : {
'content-type':'application/x-www-form-urlencoded',
},
body:'userid=abc&userpw=asd',
}
fetch('http://localhost:3000/login',options)
.then(data=>{
return data.text();
})
.then(text=>{
const root = document.querySelector('#postroot');
root.innerHTML += text+'<br />';
})
}
</script>
1. 동기 GET 요청 / 응답하기
<!-- GET 요청하기 -->
<h1>GET 요청</h1>
<form action="/login" method="get">
    <input type="text" name="userid">
    <input type="password" name="userpw">
    <input type="submit" value="get">   <!--첫번째-->
</form>
app.get('/login',(req,res)=>{
console.log(req.headers);
let {userid, userpw} = req.query;
console.log(userid,userpw);
res.send(`GET OK ${userid}/${userpw}`);
});
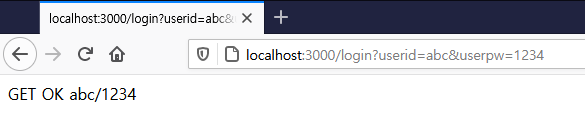
get 요청
http://localhost:3000 -> http://localhost:3000/login
이동한다
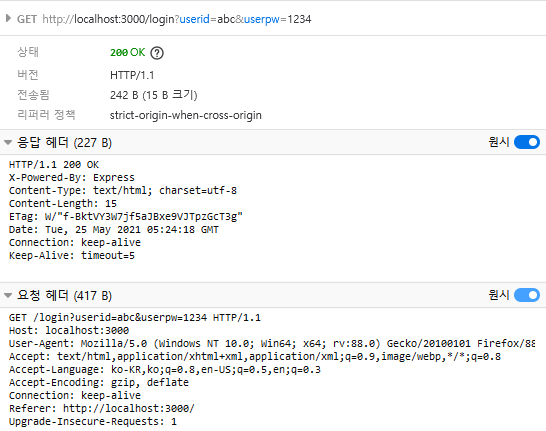
요청헤더 - 이 텍스트 파일을 server.js가 읽는다
요청 일때는 start line 이 제일 중요하다
text 문서를 읽어서 어떤걸 실행할지 정한다
★ GET /login?userid=abc&userpw=1234 HTTP/1.1 <!--start line-->
Host: localhost:3000 <!--도메인주소-->
User-Agent: Mozilla/5.0 (Windows NT 10.0; Win64; x64; rv:88.0) Gecko/20100101 Firefox/88.0
<!-- 사용자의 정보들 -->
Accept: text/html,application/xhtml+xml,application/xml;q=0.9,image/webp,*/*;q=0.8 Accept-Language: ko-KR,ko;q=0.8,en-US;q=0.5,en;q=0.3 Accept-Encoding: gzip, deflate Connection: keep-alive Referer: http://localhost:3000/ Upgrade-Insecure-Requests: 1
(빈줄)
body영역
요청을 하면 링크가 변하면서 새로운 페이지가 로드 되는데
이 역할은 html form 태그가 해준것이다.
- 링크를 바꿔줌으로써 서버가 그 내용을 받을 수 있었던 것이다
get 요청은 start line을 통해서 data를 주고 받는다고 생각하면 될듯
get 응답
★ HTTP/1.1 200 OK
X-Powered-By: Express Content-Type: text/html; charset=utf-8
Content-Length: 15
ETag: W/"f-BktVY3W7jf5aJBxe9VJTpzGcT3g"
Date: Tue, 25 May 2021 02:38:48 GMT
Connection: keep-alive
Keep-Alive: timeout=5
(한칸 띄워야함)
★ GET OK abc/1234 <!--body 영역-->
얘를 받아주는 애는 브라우저(파이어폭스)다.
브라우저가 이 text를 해석해서 body영역을 해석해서 브라우저에 보여준다.
2. 동기 POST 요청/하기
<!-- POST 요청하기 -->
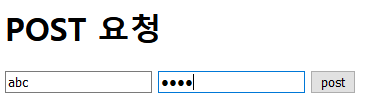
<h1>POST 요청</h1>
<form action="/login" method="post">
<input type="text" name="userid">
<input type="password" name="userpw">
<input type="submit" value="post">
</form>app.post('/login',(req,res)=>{
let {userid, userpw} = req.body;
console.log(userid,userpw);
res.send(`post OK ${userid}/${userpw}`);
});

동기 post 요청
★ POST /login HTTP/1.1
Host: localhost:3000
User-Agent: Mozilla/5.0 (Windows NT 10.0; Win64; x64; rv:88.0) Gecko/20100101 Firefox/88.0
Accept: text/html,application/xhtml+xml,application/xml;q=0.9,image/webp,*/*;q=0.8
Accept-Language: ko-KR,ko;q=0.8,en-US;q=0.5,en;q=0.3
Accept-Encoding: gzip, deflate
★ Content-Type: application/x-www-form-urlencoded // queryString
Content-Length: 22
Origin: http://localhost:3000
Connection: keep-alive
Referer: http://localhost:3000/
Upgrade-Insecure-Requests: 1
(요청 원시 부분)
★ userid=abc&userpw=1234
* 요청 부분은
body랑
content-type 부분이 중요하다
* post 형식일때
Content-Type: application/x-www-form-urlencoded
//queryString으로 오고 bodyparser가 이걸 변환해주는거임
server.js에서
start line 을 보고 post 부분을 찾는다.
그리고 uri를 보고 같은지 확인한 뒤 그 부분을 실행한다
post는 body 영역에 userid=abc&userpw=1234 이게 있다.
body영역에 넘겨줄 데이터를 쿼리스트링 형식으로 내용을 구분해서
app.post 가 받는다.
중요한 부분!! body-parser
app.use(bodyParser.urlencoded({extended:false}));
express는 이 문서를 혼자 읽을 힘이 없다.
그래서 body-parser를 사용한다.
그리고 bodyparser가 이 텍스트를 읽어서 각각의 변수를 객체 형태로 변환해준다.
userid=abc&userpw=1234
이렇게 오는걸
userid:abc
userpw:1234
이렇게 변환해준다.
동기 post 응답
★ HTTP/1.1 200 OK
X-Powered-By: Express
★ Content-Type: text/html; charset=utf-8
Content-Length: 16
ETag: W/"10-FDbj2oeyBKxzXjEu2Foi5CvaaA4"
Date: Tue, 25 May 2021 03:10:34 GMT
Connection: keep-alive
Keep-Alive: timeout=5
(응답 원시내용)
★ post OK abc/1234
브라우저가 이 문서를 읽는다.
내가 받을것들은 텍스트나 html 페이지
그리고 body 영역에 post OK abc/1234 이거를 표현해준다
3. 비동기 GET 요청/응답

통신하기를 누르면 이러한 값으로 응답이 오게 된다.
비동기 get 요청
★ GET /login?userid=abc&userpw=addd HTTP/1.1
Host: localhost:3000
User-Agent: Mozilla/5.0 (Windows NT 10.0; Win64; x64; rv:88.0) Gecko/20100101 Firefox/88.0
Accept: */*
Accept-Language: ko-KR,ko;q=0.8,en-US;q=0.5,en;q=0.3
Accept-Encoding: gzip, deflate
Referer: http://localhost:3000/
Connection: keep-alive
If-None-Match: W/"f-MDK1n1qzqnvFuuip9lTQRXK+SFo"
start line 이 중요
비동기 get 응답
★ HTTP/1.1 304 Not Modified
X-Powered-By: Express
ETag: W/"f-MDK1n1qzqnvFuuip9lTQRXK+SFo"
Date: Tue, 25 May 2021 03:45:59 GMT
Connection: keep-alive
Keep-Alive: timeout=5
(응답 원시)
★ GET OK abc/addd
동기와 비동기 비교했을때 거의 차이가 없다.
근데 왜 통신하기 버튼 누를때마다 데이터를 가져올까??
fetch 로 요청을 보내면 페이지 로딩 없이
fetch -> 내가 현재 있는 곳에서 요청하고 싶을때
-> 페이지 이동 없이 요청할때
동기든 비동기든 문서의 차이는 별로 없다
통신하기 클릭할때마다 요청-응답이 실행된다
* 로딩부분 만들기

app.get login 부분에
res.setTimeout(3000,()=>{
res.send(`GET OK ${userid}/${userpw}`);
})
를 줘서 시간차를 발생시켜본다
그러면 통신하기 버튼을 누르고 3초 후에
GET OK abc/addd
가 나오게 된다
응답이 늦게 올수록 화면에 늦게 표출된다.
연속으로 3번 누르고 기다리면
천천히 세개가 생긴다
하나 생기고 3초 후 또 하나 생기는게 아니라
3개가 3초 뒤에 좌르륵 나온다.
응답을 받지 못했어도 요청을 또 할 수 있다는 것
* 페이지 로드 불가 404 처리 부분
<!-- 비동기 활용하기 -->
<h1>비동기 활용하기 GET</h1>
<button id="btn">통신하기</button>
<div id="lodding" style="display: none;">
    <img width="50px", height="50px"  src="https://t1.daumcdn.net/cfile/tistory/184F8A4E4E55932B06">
</div>
<div id="getroot"></div>
<script>
    const btn = document.querySelector('#btn');
    btn.addEventListener('click', btnFn);
    function btnFn() {
        console.log('req click');
        document.querySelector('#lodding').style.display = 'block';
        let options = {
            method: 'GET'
        }
        //Promise Object
        fetch('http://localhost:3000/login?userid=abc&userpw=addd', options)
            .then(data => {
                //console.log("data = ",data);
                if (data.status == 404) {
                    const root = document.querySelector('#getroot');
                    root.innerHTML = '페이지가 존재하지 않음';
                }
                return data.text();     // do something with the text response 어떠한 매서드임
            })  // Promise Object
            .then(text => {   // 그 text로 변환한 값을 여기서 text로 사용한다.
                document.querySelector('#lodding').style.display = 'none';

                const root = document.querySelector('#getroot');
                root.innerHTML += text + '<br />';
                //console.log("text = ",text);
            })
    }
</script>
fetch 부분에서 localhost:3000/log?userid=abc&userpw=abc
이런식으로 url을 잘못 써주게 되면
결과가 404 가 뜨게 된다.
그래서 만약 페이지의 status 가 404가 나오면
화면에 페이지가 존재하지 않는다는 문구를 나오게 한다.
4. 비동기 POST 요청/응답

비동기 POST 요청
★ POST /login HTTP/1.1
Host: localhost:3000
User-Agent: Mozilla/5.0 (Windows NT 10.0; Win64; x64; rv:88.0) Gecko/20100101 Firefox/88.0
Accept: */*
Accept-Language: ko-KR,ko;q=0.8,en-US;q=0.5,en;q=0.3
Accept-Encoding: gzip, deflate
Referer: http://localhost:3000/
★ content-type: application/x-www-form-urlencoded
Origin: http://localhost:3000
Content-Length: 21
Connection: keep-alive
★ userid=abc&userpw=asd
비동기 POST 응답
★ HTTP/1.1 200 OK
X-Powered-By: Express
★ Content-Type: text/html; charset=utf-8
Content-Length: 15
ETag: W/"f-5Z8n+6mC3uO5xSB7XNhakr4hIDw"
Date: Tue, 25 May 2021 06:11:22 GMT
Connection: keep-alive
Keep-Alive: timeout=5
★ post OK abc/asd
동기든 비동기든 똑같이 요청을 보내고 똑같이 응답을 받는다.
-------------------------------------------------------------
* 비동기 POST
JSON으로 값 보내기
headers값을 바꿔가면서 Express 가 body 내용을 읽을 수 있는지를 확인해보자
[index.html]
btnFn2() 부분에
'Content-type' : 'application/json'
body : JSON.stringify({
userid:'abc',
userpw:'1234'
})
//JSON.stringify = json object를 스트링으로 변환해주는애
혹은
`{"userid":"abc","userpw":"ghe"}`
body에 있는 모든 값은 String으로만 보낼 수 있음
json 으로 보내도 Express로 받아보는 방법이 있다!
[server.js]
app.use(bodyParser.json());
'웹 개발 > Node JS' 카테고리의 다른 글
| 21.05.27 jwt(토큰) 를 사용하는 이유 (0) | 2021.05.27 |
|---|---|
| 21.05.26 카카오 주소 API 의 기본 (5) | 2021.05.26 |
| 21.05.24 local 로그인 & 공통(local, kakao) 로그아웃 (1) | 2021.05.24 |
| 21.05.24 kakao 로그아웃 (2) | 2021.05.24 |
| 21.05.24 kakao 로그인 체크 미들웨어 사용 (4) | 2021.05.24 |


