dukDukz
React -redux 복습 -> counter 본문
App.js
import './App.css';
import React from 'react';
import CounterContainer from './containers/CounterContainer';

function App() {
  return (
    <div>
      <CounterContainer />
    </div>
  );
}

export default App;
카운터를 구현하기 위해 redux 를 사용해보자.
폴더 트리를 확인해보자
index.js
App.js
components > Counter.js
containers > CounterContainer.js
modules > index.js
modules > counter.js
중요한 것만 보자면 이렇게 되어있다.
1. modules > counter.js
리듀서가 있는 곳이다.
/* eslint-disable default-param-last */
// 액션 타입 만들기
const SET_DIFF = 'counter/SET_DIFF';
const INCREASE = 'counter/INCREASE';
const DECREASE = 'counter/DECREASE';

// 액션 생성함수
export const setDiff = (diff) => ({ type: SET_DIFF, diff });
export const increase = () => ({ type: INCREASE });
export const decrease = () => ({ type: DECREASE });

// 초기 상태 선언
const initialState = {
  number: 0,
  diff: 1,
};

// 리듀서 선언
// 리듀서는 export default 로 내보낸다.
export default function counter(state = initialState, action) {
  switch (action.type) {
    case SET_DIFF:
      return {
        ...state,
        diff: action.diff,
      };
    case INCREASE:
      return {
        ...state,
        number: state.number + state.diff,
      };
    case DECREASE:
      return {
        ...state,
        number: state.number - state.diff,
      };
    default:
      return state;
  }
}
액션 타입에 따라 리듀서가 동작하도록 한다.
이렇게 처리해준 것을 index 에 모으려고 한다.
2. modules > index.js
import { combineReducers } from 'redux';
import counter from './counter';

const rootReducer = combineReducers({
  counter,
});

export default rootReducer;
다른 리듀서를 만들면 이와 동일하게 추가해주면 된다.
그런 다음 root 디렉토리에 있는 index.js 파일에서 모든 컴포넌트에서 store에 접근이 가능하도록 처리해주면 된다.
3. index.js
import React from 'react';
import ReactDOM from 'react-dom';
import './index.css';
import { createStore } from 'redux';
import { Provider } from 'react-redux';
import App from './App';
import reportWebVitals from './reportWebVitals';
import rootReducer from './modules/index';

const store = createStore(rootReducer);

ReactDOM.render(
  <Provider store={store}>
    <App />
  </Provider>,
  document.getElementById('root'),
);

reportWebVitals();
맨 위에서 보면 App.js 안에서 components > Counter.js 를 바로 쓰지 않고 container 에 담은 CounterContainer.js 를 불러와서 사용한걸 볼 수 있다.
어떻게 사용해도 상관없다. 컴포넌트를 그 자체로 사용해도 괜찮고 컨테이너에 담아도 괜찮다.
나는 평소에 컴포넌트를 그대로 사용하는데 이번에는 학습을 위해 컨테이너에 담은 것으로 실습해 보았다.

이렇게 되어있는거로 생각하면 되겠다.
containers > CounterContainer.js
/* eslint-disable no-shadow */
import React from 'react';
import { useSelector, useDispatch } from 'react-redux';
import { increase, decrease, setDiff } from '../modules/counter';
import Counter from '../components/Counter';

function CounterContainer() {
  // useSelector 는 리덕스 스토어의 상태를 조회하는 hook 이다.
  // state의 값은 store.getState() 함수를 호출했을 때 나타나는 결과물과 동일하다.

  const { number, diff } = useSelector((state) => ({
    number: state.counter.number,
    diff: state.counter.diff,
  }));
  console.log(number, diff);

  // useDispatch 는 리덕스 스토어의 dispatch 를 함수에서 사용 할 수 있게 해주는 Hook 입니다
  const dispatch = useDispatch();

  // 각 액션을 디스패치하는 함수를 만들자
  const onIncrease = () => { dispatch(increase()); };
  const onDecrease = () => { dispatch(decrease()); };
  const onSetDiff = (diff) => { dispatch(setDiff(diff)); };

  return (
    <Counter
      number={number}
      diff={diff}
      onIncrease={onIncrease}
      onDecrease={onDecrease}
      onSetDiff={onSetDiff}
    />
  );
}

export default CounterContainer;
컨테이너를 보면 먼저 리덕스 스토어에 있는 것들을 가져온다.
그리고 useSelector를 최적화하기 위해서는 이렇게 객체로 가져오기보다는 각각 가져오는 방법을 쓰는것이 좋다고 한다.
그런 다음 dispatch 를 사용할 수 있게 useDispatch hooks 를 사용한다.
이후에 각 액션을 디스패치 하는 함수를 작성한다.
그 함수들을 Counter 컴포넌트에 보낼 것이다.
components > Counter.js
import React from 'react';

function Counter({
  number, diff, onIncrease, onDecrease, onSetDiff,
}) {
  const onChange = (e) => {
    // e.target.value의 타입은 문자열이므로 숫자로 변환해주어야 한다.
    onSetDiff(parseInt(e.target.value, 10));
  };
  return (
    <div>
      <h1>{number}</h1>
      <div>
        <input type="number" value={diff} min="1" onChange={onChange} />
        <button type="button" onClick={onIncrease}>+</button>
        <button type="button" onClick={onDecrease}>-</button>
      </div>
    </div>
  );
}
export default Counter;
액션을 디스패치하는 함수들을 받아왔다면
해당 함수들을 각 버튼에 적용시키자.
증가 감소 버튼에 넣고
input 을 보면 value = {diff} 라고 되어 있는데, diff 값 만큼 증가하고 감소한게 동작하고 싶기에 input 에는 onChange 함수를 준다.
그리고 이 onChange 함수의 e.target.value를 숫자로 변환하여 onSetDiff 로 보낸다.
뒤에 10은 10진수이다. 생략 가능하다.

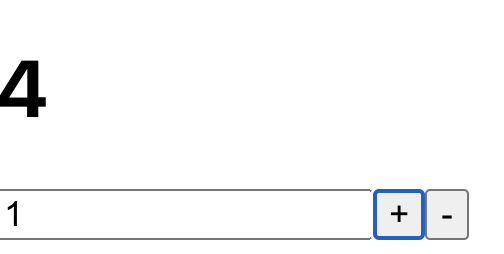
이런식으로 나온다.
https://react.vlpt.us/redux/01-keywords.html
1. 리덕스에서 사용되는 키워드 숙지하기 · GitBook
1. 리덕스에서 사용되는 키워드 숙지하기 리덕스를 사용하게 될 때 앞으로 접하게 될 키워드들을 미리 알아봅시다. 이 키워드들 중에서 대부분은 이전에 useReducer를 사용해볼때 접해본 개념이기
react.vlpt.us
'웹 개발 > React' 카테고리의 다른 글
| React-Query 비동기 통신 (기본편) (0) | 2022.02.11 |
|---|---|
| [Error] Manifest: Line: 1, column: 1, Syntax error. (0) | 2022.02.11 |
| [React] useReducer (0) | 2022.01.27 |
| [React] useCallback - 함수 재사용하기 (0) | 2022.01.27 |
| [React] useMemo - 자원을 효율적으로 memorized (0) | 2022.01.26 |

